|
|
 |
|
First, you get a generous person to loan you a new SS lip to make the mold from.
|
|
|
 |
|
Attach a stabilizing bar to keep it from losing its overall dimensions and any
warping.
|
|
|
 |
|
Mask off the back side to protect it from damage during the mold making process.
|
|
|
 |
|
Make a plaster mold for making wax sheets.
Melt wax and pour.
|
|
|
 |
|
Two sheets won't do it but eight will.
|
|
|
 |
|
Now, form the wax sheets around the back so that the edges extend over the outside
edges of the model
|
|
|
 |
|
Fortunately, the model had studs that could be used to hold the wax sheets in
place.
|
|
|
 |
|
Using soft plasticene clay, smooth and blend surface of wax sheets into the edges
of the model.
|
|
|
 |
|
Apply a coat of high carnuba paste wax, spray a coat of PVA mold release and allow
to dry. Apply a second coat of wax and PVA.
Relax and have two beers then take a picture.
|
|
|
 |
|
Spray a coat of jell-coat and allow to set up.
Apply 2 layers of glass cloth and two layers glass mat.
|
|
|
 |
|
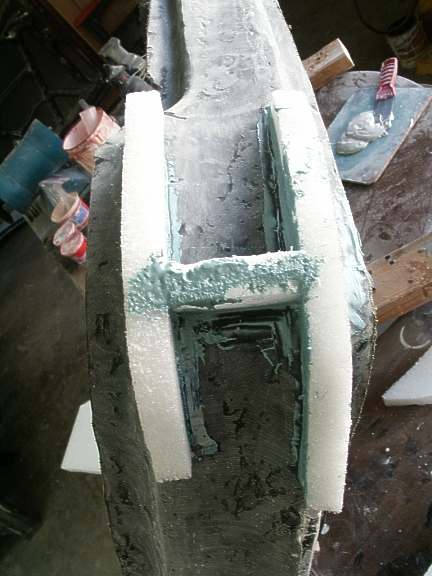
Cut and shape one inch Styrofoam sheet to from reinforcing ribs. Polyester
resin will melt or dissolve Styrofoam. To prevent this apply a thin veneer of
"Bondo", automotive body repair paste, with either a brush or trowel. Bondo
contains polyester resin but sets fast enough to prevent the foam from melting.These ribs can be made from plywood or even heavy cardboard. I prefer
the foam as it is easy to shape and adds very little weight to the mold.
|
|
|
 |
|
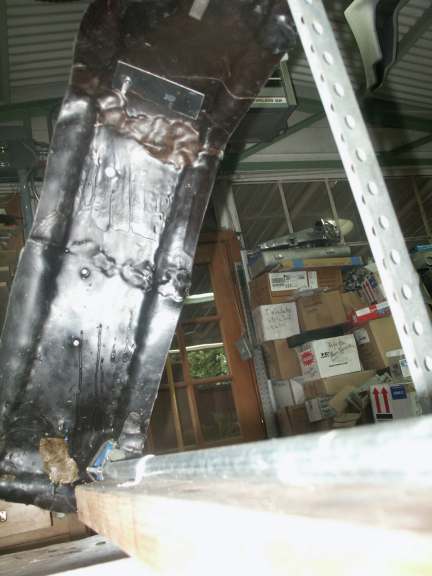
These ribs will be covered with fiberglass, as seen below. The model is held
by a jig that is attached to a large round rotating (Lazy-Susan) work surface. This allows
the model be be rotated for easy mold building. A screw stop is used when rotation is not
required. |
|
|
 |
|
Close up of the Styrofoam ribs covered with 2 layers of glass cloth with the
support stand attached.
|
|
|
 |
|
|
|
|
 |
|
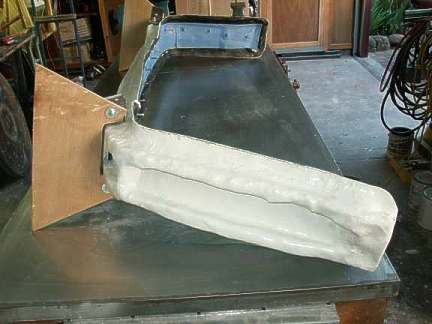
The original OEM SS spoiler ("model") is still in the mold. The back
side still has the blue masking tape covering the surface. |
|
|
 |
|
Mold stand and bracket attachment.
|
|
|
 |
|
This is how the mold will sit for "lay-up". |


